DIY Solar Powered Light Jar

-Portfolio
Solar Black Path Light
-
Hermetic, flip-top canning jar
-
Frosting glass spray
Step 1:
First,
you will need to frost the glass jar. Follow the directions on the back of the
spray can. Make sure to do this outside. Also, do NOT frost the top of the jar.
You will need this to be clear for the solar panel. To avoid frosting the top
of the jar, you can wrap a plastic bag around it and tie it off with a twist
tie, like we did.

Step 2:
Spray
the frost onto the outside of the jar. Let dry.

Step 3:
Make
sure to spray the bottom of the jar, once the first coat is dry.

Step 4:
Pull the
top off of the path light. (Just the solar panel part.) Take the battery out, to
be safe while working on cutting everything out. You will need to unscrew the
back off of the solar panel. If you do not have a screwdriver small enough, you
can improvise and use a knife like we did. Just be careful.


Step 5:
Cut the
plastic around the solar panel. You may need to use pliers to bend the metal
back. Try to remove as much plastic as possible. You just want the solar panel.
WARNING: METAL CAN BE SHARP!!


Step 6:
Cut the
excess plastic around the battery and wires. Cut as much off as you can, you
want it to be able to fit inside the jar lid.


This is what you should have left:

Step 7:
Put the
battery back in the solar panel. Tape the two pieces of solar panel together as
securely as possible. (You may also use glue.)

Step 8:
Tape the
solar panel into the top of the jar.


Step 9:
Close
the lid of the jar. Let sit in the sun to charge.

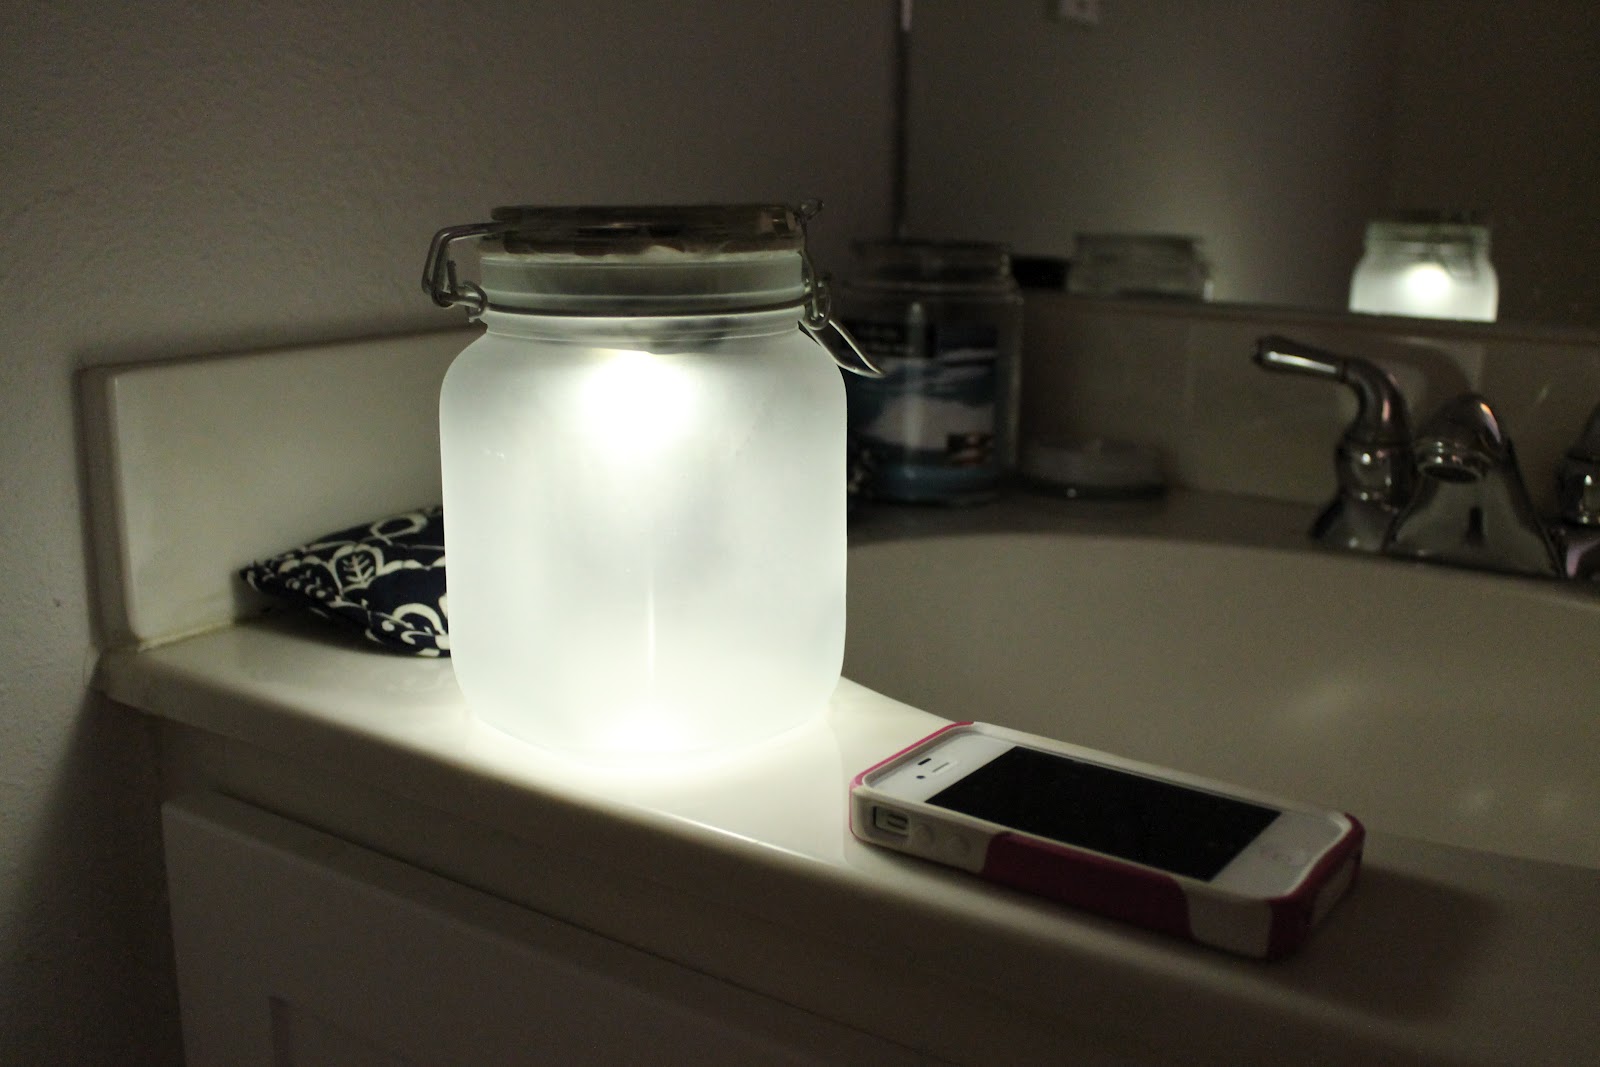
Step 10:
Watch
your creation GLOW! (You can also do colors by placing colored plastic over the
LED light inside!)

No comments:
Post a Comment